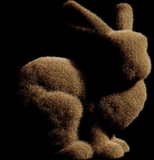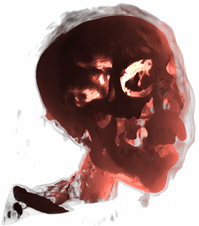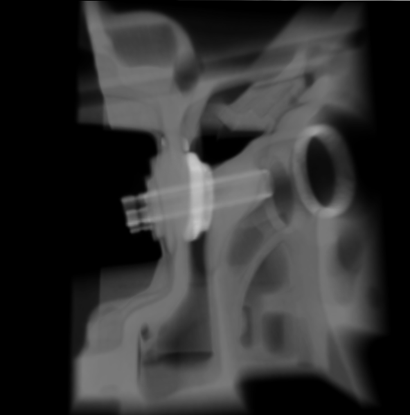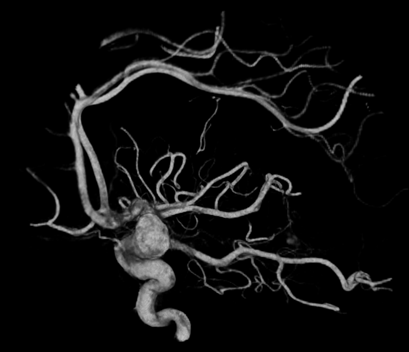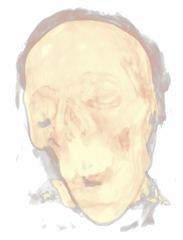
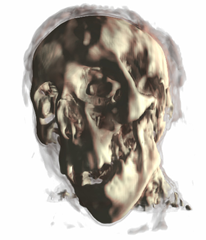
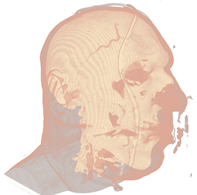
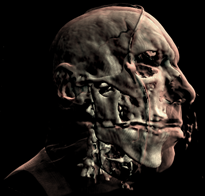
Mummy (top) and Male (bottom) volumes colored with a transfer function (left) and shaded (right).
A transfer function is used to assign RGB and alpha values for every voxel in the volume. A 1D transfer function maps one RGBA value for every isovalue [0, 255]. Multi-dimensional transfer functions allow multiple RGBA values to be mapped to a single isovalue. These are however out of the scope of this tutorial, so I will just focus on 1D transfer functions.
The transfer function is used to "view" a certain part of the volume. As with the second set of pictures above, there is a skin layer/material and there is a skull layer/material. A transfer function could be designed to just look at the skin, the skull, or both (as is pictured). There are a few different ways of creating transfer functions. One is two manually define the transfer functions by specifying the RGBA values for the isovalues (what we will be doing), and another is through visual controls and widgets. Manually defining the transfer function is a lot like guess work and takes a bit of time, but is the easiest way to get your feet wet. Visually designing transfer functions is the easiest way to get good results quickly as it happens at run-time. But this method is quite complex to implement (at least for a tutorial).
Creating the transfer function:
To create a transfer function, we want to define the RGBA values for certain isovalues (control points or control knots) and then interpolate between these values to produce a smooth transition between layers/materials. Our transfer function will result in a 1D texture with a width of 256.
First we have the TransferControlPoint class. This class takes an RGB color or alpha value for a specific isovalue.
public class TransferControlPoint{
    public Vector4 Color;
    public int IsoValue;

    /// <summary>
    /// Constructor for color control points.
    /// Takes rgb color components that specify the color at the supplied isovalue.
    /// </summary>
    /// <param name="x"></param>
    /// <param name="y"></param>
    /// <param name="z"></param>
    /// <param name="isovalue"></param>
    public TransferControlPoint(float r, float g, float b, int isovalue)
    {
        Color.X = r;
        Color.Y = g;
        Color.Z = b;
        Color.W = 1.0f;
        IsoValue = isovalue;
    }

    /// <summary>
    /// Constructor for alpha control points.
    /// Takes an alpha that specifies the aplpha at the supplied isovalue.
    /// </summary>
    /// <param name="alpha"></param>
    /// <param name="isovalue"></param>
    public TransferControlPoint(float alpha, int isovalue)
    {
        Color.X = 0.0f;
        Color.Y = 0.0f;
        Color.Z = 0.0f;
        Color.W = alpha;
        IsoValue = isovalue;
    }
}
This class will represent the control points that we will interpolate. I've added two lists to the Volume class, mAlphaKnots and mColorKnots. These will be the list of transfer control points that we will setup and interpolate to produce the transfer function. To produce the result for the Male dataset above, here are the transfer control points that we will define:
mesh.ColorKnots = new List<TransferControlPoint> {
                        new TransferControlPoint(.91f, .7f, .61f, 0),
                        new TransferControlPoint(.91f, .7f, .61f, 80),
                        new TransferControlPoint(1.0f, 1.0f, .85f, 82),
                        new TransferControlPoint(1.0f, 1.0f, .85f, 256)
                        };

mesh.AlphaKnots = new List<TransferControlPoint> {
                        new TransferControlPoint(0.0f, 0),
                        new TransferControlPoint(0.0f, 40),
                        new TransferControlPoint(0.2f, 60),
                        new TransferControlPoint(0.05f, 63),
                        new TransferControlPoint(0.0f, 80),
                        new TransferControlPoint(0.9f, 82),
                        new TransferControlPoint(1f, 256)
                        };
You need to specify at least two control points at isovalues 0 and 256 for both alpha and color. Also the control points need to be ordered (low to high) by the isovalue. So the first entry in the list should always be the RGB/alpha value for the zero isovalue, and the last entry should always be the RGB/alpha value for the 256 isovalue. The above list of control points produce the following transfer function after interpolation:
So we have defined a range of color for the skin and a longer range of color for the skull/bone.
But how do we interpolate between the control points? We will fit a cubic spline to the control points to produce a nice smooth interpolation between the knots. For a more in-depth discussion on cubic splines refer to my camera animation tutorial.
Here is a simple graph representation of the spline that is fit to the control points.

Using the transfer function:
So how do we put this transfer function to use? First we set it to a 1D texture and upload it to the graphics card. Then in the shader, we simply take the isovalue sampled from the 3d volume texture and use that to index the transfer function texture.
value = tex3Dlod(VolumeS, pos);

src = tex1Dlod(TransferS, value.a);
Now we have the color and opacity of the current sample. Next, we have to shade it. While this is simply diffuse shading I will go over how to calculate gradients (aka normals) for the 3D volume.
Calculating Gradients:
The method we will use to calculate the gradients is the central differences scheme. This takes the last and next samples of the current sample to calculate the gradient/normal. This can be performed at run-time in the shader, but as it requires 6 extra texture fetches from the 3D texture, it is quite slow. So we will calculate the gradients and place them in the RGB components of our volume texture and move the isovalue to the alpha channel. This way we only need one volume texture for the data set instead of two: one for the gradients and one for the isovalues.
Calculating the gradients is pretty simple. We just loop through all the samples and find the difference between the next and previous sample to calculate the gradients:
/// <summary>
/// Generates gradients using a central differences scheme./// </summary>
/// <param name="sampleSize">The size/radius of the sample to take.</param>private void generateGradients(int sampleSize)
{
    int n = sampleSize;
    Vector3 normal = Vector3.Zero;
    Vector3 s1, s2;

    int index = 0;
    for (int z = 0; z < mDepth; z++)
    {
        for (int y = 0; y < mHeight; y++)
        {
            for (int x = 0; x < mWidth; x++)
            {
                s1.X = sampleVolume(x - n, y, z);
                s2.X = sampleVolume(x + n, y, z);
                s1.Y = sampleVolume(x, y - n, z);
                s2.Y = sampleVolume(x, y + n, z);
                s1.Z = sampleVolume(x, y, z - n);
                s2.Z = sampleVolume(x, y, z + n);

                mGradients[index++] = Vector3.Normalize(s2 - s1);
                if (float.IsNaN(mGradients[index - 1].X))
                    mGradients[index - 1] = Vector3.Zero;
            }
        }
    }
}
Next we will filter the gradients to smooth them out and prevent any high irregularities. We achieve this by a simple NxNxN cube filter. A cube filter simply averages the surrounding N^3 - 1 samples. Here's the code for the gradient filtering:
/// <summary>
/// Applies an NxNxN filter to the gradients./// Should be an odd number of samples. 3 used by default./// </summary>
/// <param name="n"></param>private void filterNxNxN(int n)
{
    int index = 0;
    for (int z = 0; z < mDepth; z++)
    {
        for (int y = 0; y < mHeight; y++)
        {
            for (int x = 0; x < mWidth; x++)
            {
                mGradients[index++] = sampleNxNxN(x, y, z, n);
            }
        }
    }
}

/// <summary>
/// Samples the sub-volume graident volume and returns the average./// Should be an odd number of samples./// </summary>
/// <param name="x"></param>
/// <param name="y"></param>
/// <param name="z"></param>
/// <param name="n"></param>
/// <returns></returns>private Vector3 sampleNxNxN(int x, int y, int z, int n)
{
    n = (n - 1) / 2;

    Vector3 average = Vector3.Zero;
    int num = 0;

    for (int k = z - n; k <= z + n; k++)
    {
        for (int j = y - n; j <= y + n; j++)
        {
            for (int i = x - n; i <= x + n; i++)
            {
                if (isInBounds(i, j, k))
                {
                    average += sampleGradients(i, j, k);
                    num++;
                }
            }
        }
    }

    average /= (float)num;
    if (average.X != 0.0f && average.Y != 0.0f && average.Z != 0.0f)
        average.Normalize();

    return average;
}
This is a really simple and slow way of filtering the gradients. A better way is to use a seperable 3D Gaussian kernal to filter the gradients.
Now that we have the gradients we just fill the xyz components of the 3D volume texture and put the isovalue in the alpha channel:
//transform the data to HalfVector4HalfVector4[] gradients = new HalfVector4[mGradients.Length];
for (int i = 0; i < mGradients.Length; i++)
{
    gradients[i] = new HalfVector4(mGradients[i].X, mGradients[i].Y, mGradients[i].Z, mScalars[i].ToVector4().W);
}

mVolume.SetData<HalfVector4>(gradients);
mEffect.Parameters["Volume"].SetValue(mVolume);
And that's pretty much it. Creating a good transfer function can take a little time, but this simple 1D transfer function can still produce pretty good results. Here's a few captures of what this demo can produce:
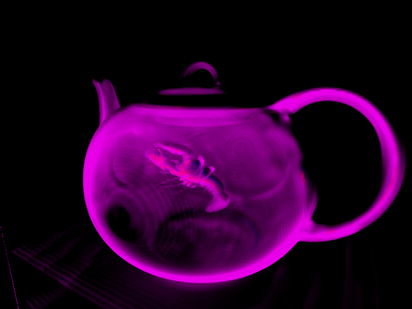
A teapot with just transfer function:

The teapot with transfer function and shaded:


Now a CT scan of a male head. Just transfer function:

Now with shading:


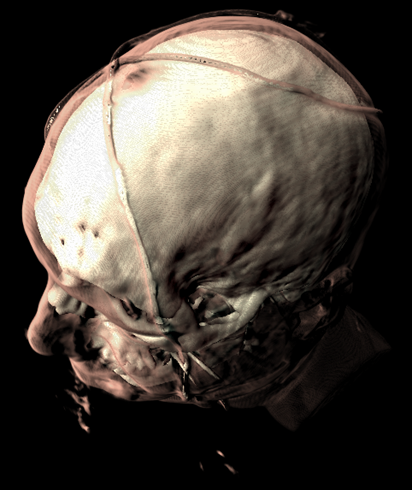


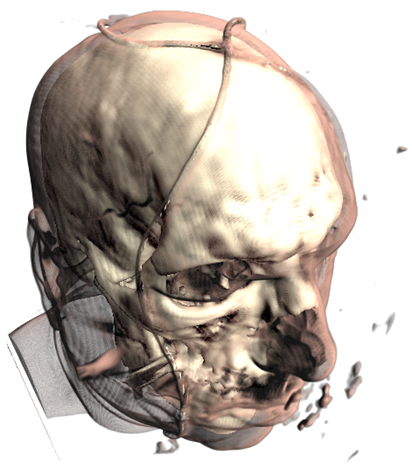
And a mummy:


*The CT Male data set was converted from PVM format to RAW format with the V3 library. The original data set can be found here: http://www9.informatik.uni-erlangen.de/External/vollib/

