Pages

Showing posts with label shadow mapping. Show all posts

Friday, July 18, 2008

Dual-Paraboloid Variance Shadow Mapping

dp_vsm

Edit: Added the video that I recently made

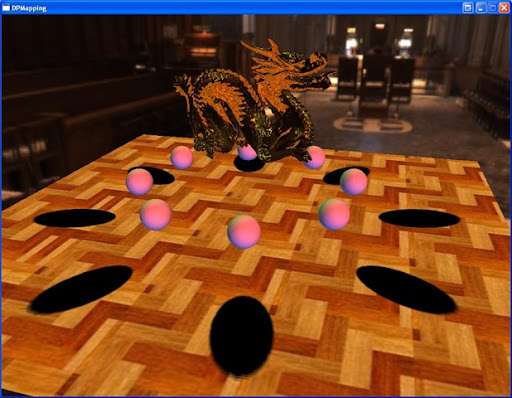
I have to say, I really like variance shadow mapping. It's such a simple(ingenious) technique to implement, but it provides such nice looking results. I haven't had the need to implement the technique before, but I'm glad I did. Last post we implemented dual-paraboloid shadow mapping. And those of you with a PS 3.0 graphics card were able to have semi-soft shadows with percentage closer filtering. But now when we get rid of the PCF filter, and replace it with variance shadow mapping, we can fit all the code inside the PS 2.0 standard. Anyway, on to the code.

Variance Shadow Mapping Paper + Demo

Building the shadow maps:

Variance shadow mapping is really simple to implement. First thing we need to change is to create either a RG32F or RG16F surface format for our front and rear shadow maps (instead of R32F/R16F). This allows us to store the depth of the pixel in the red channel and the squared depth of the pixel in the green channel. So our new pixel shader for building the depth/shadow maps is this:

return float4(z, z * z, 0, 0, 1);

Blurring the shadow maps:

Variance shadow mapping improves upon standard shadow mapping by storing a distribution of depths at each pixel (z * z, and z) instead of the single depth (as with standard shadow mapping). And because it stores a distribution of depth, we can blur the shadow maps. This would produce some funky/incorrect results if we were just doing standard shadow mapping with a PCF filter.

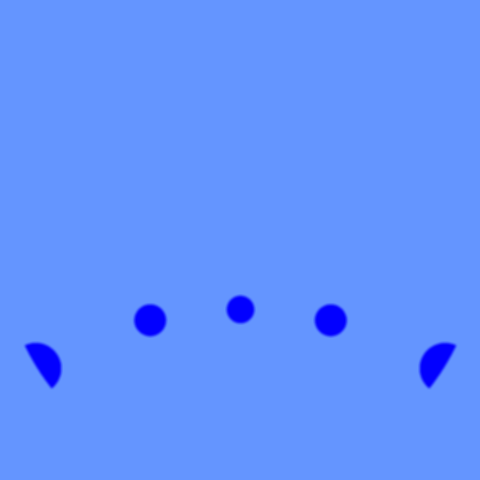
So, after we have created our depth maps, we will blur them with a separable Gaussian blur. This will perform two passes on each shadow map; the first will perform a horizontal blur and the second will perform a vertical blur. There is a wealth of information on the internet on how to do this so I won't explicitly cover this. Here's what our front shadow map looks like after being blurred:

depth_front

Variance shadow mapping:

We build our texture coordinates exactly the same as the previous method of shadow mapping. But the depth comparison is a little different. You can refer to the VSM paper for an in-depth discussion, but here is the gist of it. Since we filtered our shadow maps with a Gaussian blur, we need to recover the moments over that filter region. The moments are simple the depth and squared depth we stored in the texture. From these we can build the mean depth and the variance at the pixel. And as such the variance can be interpreted as a quantitative measure of the width of a distribution (Donelly/Lauritzen). This measure places a bound on the distribution and can be represented by Chebychev's inequality.

float depth;
float mydepth;
float2 moments;
if(alpha >= 0.5f)
{
moments = tex2D(ShadowFrontS, P0.xy).xy;
depth = moments.x;
mydepth = P0.z;
}
else
{
moments = tex2D(ShadowBackS, P1.xy).xy;
depth = moments.x;
mydepth = P1.z;
}

float lit_factor = (mydepth <= moments[0]);

float E_x2 = moments.y;
float Ex_2 = moments.x * moments.x;
float variance = min(max(E_x2 - Ex_2, 0.0) + SHADOW_EPSILON, 1.0);
float m_d = (moments.x - mydepth);
float p = variance / (variance + m_d * m_d); //Chebychev's inequality

texColor.xyz *= max(lit_factor, p + .2f); //lighten the shadow just a bit (with the + .2f)

return texColor;

5x5 Guassian Blur

dp_vsm2


9x9 Guassian Blur

dp_vsm3

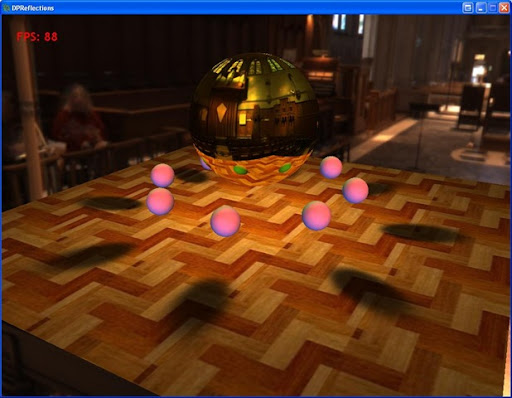
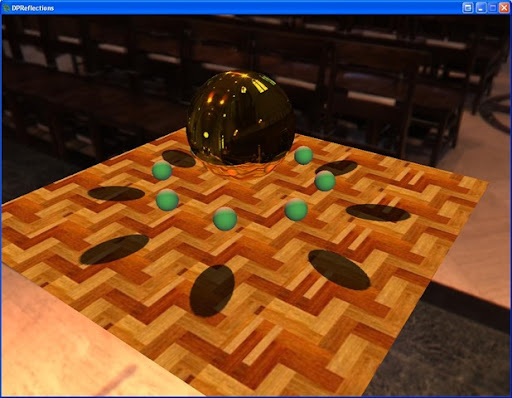
And there you go. Nice looking dual-paraboloid soft shadows thanks to variance shadow mapping.

As before, your card needs to support either RG16F or RG32F formats (sorry again Charles :) ). You can refer to the VSM paper and demo on how to map 2 floats to a single ARGB32 pixel if your card doesn't support the floating point surface formats.


Thursday, July 17, 2008

Dual-Paraboloid Shadow Maps

DPShadow2

Last time I introduced using dual-paraboloid environment mapping for reflections. Well now we're going to apply the same process to shadows. So if you haven't looked at my previous post, read it over before going on.

Creating the depth/shadow maps is exactly the same as when we created the reflection maps with one exception. Instead of outputting color in the pixel shader, we output the depth of the 3d pixel, like so:

return depth.x / depth.y;

Where depth.x is the depth of the pixel and depth.y is the w component. And here is the resulting depth/shadow map for the front hemisphere.

depth_f

Now, to map the shadows the process is also very similar to how we generated the reflections. We follow a similar process in the pixel shader:

  • Generate the texture coordinates for the front and rear paraboloids
  • Generate the depth of the pixel
  • Test to see if the pixel is in shadow

We generate the texture coordinates exactly as when we generated the reflection texture coordinates. To generate the depth of the pixel we take the length of the vector from the vertex to the origin of the paraboloid (0, 0, 0) and divide by the light attenuation. Also to check which hemisphere we are in, we calculate an alpha that is the Z value of the transformed vertex and offset by .5f;

float L = length(pos);
float3 P0 = pos / L;

float alpha = .5f + pos.z / LightAttenuation;
//generate texture coords for the front hemisphere
P0.z = P0.z + 1;
P0.x = P0.x / P0.z;
P0.y = P0.y / P0.z;
P0.z = L / LightAttenuation;

P0.x = .5f * P0.x + .5f;
P0.y = -.5f * P0.y + .5f;

float3 P1 = pos / L;
//generate texture coords for the rear hemisphere
P1.z = 1 - P1.z;
P1.x = P1.x / P1.z;
P1.y = P1.y / P1.z;
P1.z = L / LightAttenuation;

P1.x = .5f * P1.x + .5f;
P1.y = -.5f * P1.y + .5f;

Now that we have generated our texture coordinates we need to test the depth of the pixel against the depth in the shadow map. To do this we index either the front or rear shadow map with the texture coordinates we generated to get the depth and compare this to our depth. If the depth is less than our depth, then the pixel is in shadow.

float depth;
float mydepth;
if(alpha >= 0.5f)
{
depth = tex2D(ShadowFrontS, P0.xy).x;
mydepth = P0.z;
}
else
{
depth = tex2D(ShadowBackS, P1.xy).x;
mydepth = P1.z;
}

//lighten the shadow just a bit so it isn't completely black
if((depth + SHADOW_EPSILON) < mydepth)
texColor.xyz *= 0.3f;

return texColor;

DPShadow

And that's it. Now we have dual-paraboloid shadow mapping. If you have a pixel shader 3.0 graphics card, then the shadow also has a percentage closer filter applied to it. You also may notice seams in the shadows. This is because the splitting plane of the paraboloids is the x-axis (since the paraboloids look down the +/- z-axis). This is one of the problems of using paraboloid mapping for shadows. One has to be careful where they place the split plane to avoid this situation. Pixels that are in the center of either hemisphere suffer little distortion. But this is just a tutorial so I didn't worry too much about it.

Also you're graphics card must be able to support R32F or R16F surface formats to run the demo out of the box (sorry Charles ;) ). Otherwise, you must use the ARGB32 format and pack the depth values in all 4 channels. Here is some code to pack/unpack to/from an ARGB32 surface format. You pass the depth value to the pack method when you render to the shadow maps, and you pass the float4 color to the unpack method when you fetch from the shadow maps. I decided not to implement this so the code wouldn't become complicated by something that doesn't add to the tutorial.

//pack the depth in a 32-bit rgba color
float4 mapDepthToARGB32(const float value)
{
const float4 bitSh = float4(256.0 * 256.0 * 256.0, 256.0 * 256.0, 256.0, 1.0);
const float4 mask = float4(0.0, 1.0 / 256.0, 1.0 / 256.0, 1.0 / 256.0);
float4 res = frac(value * bitSh);
res -= res.xxyz * mask;
return res;
}

//unpack the depth from a 32-bit rgba color
float getDepthFromARGB32(const float4 value)
{
const float4 bitSh = float4(1.0 / (256.0 * 256.0 * 256.0), 1.0 / (256.0 * 256.0), 1.0 / 256.0, 1.0);
return(dot(value, bitSh));
}

Next time I'll introduce using variance shadow mapping with our dual-paraboloid shadow mapping to give nice soft shadows that we can still use with pixel shader 2.0 cards.


Thursday, March 20, 2008

More Software Rendering...

Quick update. Just found a video I had made of the software renderer.


Not perfect, but pretty good I'd say.

Technorati Profile

Wednesday, March 19, 2008

Software Rendering

About a year ago, I took a class on software rasterization. It really helped me understand everything that DirectX/Opengl does underneath the hood. We started out by rasterizing 2D lines and images and then moved onto a full 3D renderer all done in software (i.e. on the cpu). It was a pretty cool class. The focus of the class was mainly on implementation rather than performance, so it isn't as fast as other software renderers.

I wrote the rasterizer using c#, and the Tao opengl framework (only for sending the pixel information to the graphics card with glDrawPixels()). I posted this on image of the day at gamedev: http://www.gamedev.net/community/forums/topic.asp?topic_id=446142

Here's what I had accomplished by the end of the semester:
  • Gouraud shading
  • Phong shading
  • Blinn and Phong specular reflection
  • Directional and Point lights
  • Perspective correct texture mapping
  • Normal Mapping
  • Parallax Mapping
  • Projective Texturing
  • Shadow Mapping
  • Environment Mapping - for skybox and distant reflections
  • Distance Fog
  • Depth of Field
  • Bilinear Filtering
  • Camera Interpolation, for movie creation
environment mapped reflections:


perspective correct texture mapping:


depth of field:


distance based fog:


parallax mapping:


shadow mapping with percentage closer filtering: