Pages

Thursday, February 2, 2012

Optix.NET: a managed wrapper for Nvidia Optix

Today I released an open source project I’ve been working on for the last week, Optix.NET. It’s a lightweight wrapper around Nvidia’s Optix GPU ray-tracing library. I figured since there aren’t any .NET wrappers around that I’d go ahead and make one myself. The project started out as a curiosity of managed wrappers and a little of a learning experience working with c++/cli. It’s still in the Alpha stage of development so there may be some bugs, and if you have any suggestions feel free to drop me a line. The math library is pretty sparse at the moment, having only implemented functions that I needed.

Optix.NET may head in the direction of CUDAfy where you can create your optix programs in-line with your C#. The current downside with Optix.NET is that you cannot share structs/classes with your Optix programs as you can when working with the original c/c++ library.

The Optix.NET SDK also comes with a (at the moment very) basic demo framework for creating Optix applications. Such as a basic OBJ model loader and simple camera.

As I talked a little about last post on Instant Radiosity, the general flow of Optix is:
  • Create a context
    • This is similar to a D3D Device.
  • Create material programs
    • These will run when there is an intersection and are akin to pixel shaders.
  • Create intersection programs
    • These are responsible for performing ray-geometry intersection.
  • Create the main entry program / ray-generation program
    • These will launch eye rays in a typical pinhole camera ray-tracer
  • Load geometry data and creating a scene hierarchy
  • Perform ray-tracing and display results.
To get a very good introduction to Optix I recommend following the programming guide and quick start guide that comes with the Optix SDK. Let’s get to it then.

This small tutorial will walk through the steps of Sample 6 in the Optix.NET SDK and create a simple program that will ray-trace a cow and shade it with its interpolated normals.

Creating the Optix Context

Context = new Context();
Context.RayTypeCount = 1;
Context.EntryPointCount = 1;

Here we uh create our rendering context :-). We also set the ray type count. This tells optix how many different types of rays will be traversing the scene (e.g. Eye rays, indirect rays, shadow rays, etc ). EntryPointCount sets the number of main entry programs there will be.

Creating the material

Material material = new Material( Context );
material.Programs[ 0 ] = new SurfaceProgram( Context, RayHitType.Closest, shaderPath, "closest_hit_radiance" );

This creates a material that the geometry will use and assigns a SurfaceProgram (similar to a pixel shader), and tells Optix to run this shader on the closest ray-geometry intersection so that there is propery depth sorting.

Creating geometry

Next the geometry is loaded. For brevehity’s sake that part is omitted, but I show the important part of how you get your geometry into Optix.

First we create geometry buffers, similar to vertex and index buffers in D3D, and fill them with the positions, normals, texture coordinates, and triangle indices.

//create buffer descriptions
BufferDesc vDesc = new BufferDesc() { Width = (uint)mVertices.Count,  Format = Format.Float3, Type = BufferType.Input };
BufferDesc nDesc = new BufferDesc() { Width = (uint)mNormals.Count,   Format = Format.Float3, Type = BufferType.Input };
BufferDesc tcDesc = new BufferDesc(){ Width = (uint)mTexcoords.Count, Format = Format.Float2, Type = BufferType.Input };
BufferDesc iDesc = new BufferDesc() { Width = (uint)mIndices.Count,   Format = Format.Int3,   Type = BufferType.Input };

// Create the buffers to hold our geometry data
Optix.Buffer vBuffer = new Optix.Buffer( Context, ref vDesc );
Optix.Buffer nBuffer = new Optix.Buffer( Context, ref nDesc );
Optix.Buffer tcBuffer = new Optix.Buffer( Context, ref tcDesc );
Optix.Buffer iBuffer = new Optix.Buffer( Context, ref iDesc );

vBuffer.SetData<Vector3>( mVertices.ToArray() );
nBuffer.SetData<Vector3>( mNormals.ToArray() );
tcBuffer.SetData<Vector2>( mTexcoords.ToArray() );
iBuffer.SetData<Int3>( mIndices.ToArray() );

Next we create a Geometry node that will tell Optix what intersection programs to use, how many primitives our geometry has, and creates shader variables to hold the geometry buffers.

//create a geometry node and set the buffers
Geometry geometry = new Geometry( Context );
geometry.IntersectionProgram = new Program( Context, IntersecitonProgPath, IntersecitonProgName );
geometry.BoundingBoxProgram = new Program( Context, BoundingBoxProgPath, BoundingBoxProgName );
geometry.PrimitiveCount = (uint)mIndices.Count;

geometry[ "vertex_buffer" ].Set( vBuffer );
geometry[ "normal_buffer" ].Set( nBuffer );
geometry[ "texcoord_buffer" ].Set( tcBuffer );
geometry[ "index_buffer" ].Set( iBuffer );

Now we create a GeometryInstance that pairs a Geometry node with a Material (that we created earlier ).

//create a geometry instance
GeometryInstance instance = new GeometryInstance( Context );
instance.Geometry = geometry;
instance.AddMaterial( Material );

//create an acceleration structure for the geometry
Acceleration accel = new Acceleration( Context, AccelBuilder.Sbvh, AccelTraverser.Bvh );
accel.VertexBufferName = "vertex_buffer";
accel.IndexBufferName = "index_buffer";

We then create an Acceleration structure ( or Bounding Volume Hierarchy ) that will create a spatial data structure that will optimize the ray traversal of the geometry. Here we create the Acceleration node with a Split BVH builder and a BVH traverser. This informs Optix how the BVH should be built and traversed. We also give the Acceleration structure the name of the vertex and index buffers so that it can use that data to optimize the building of the Split BVH (assigning the names of the vertex and index buffers is only required with Sbvh and TriangkeKdTree AccelBuilders ).

Next we create a top-level node to hold our hierarchy. We give it the acceleration structure and the geometry instance. Optix will use this top-level node to begin its scene traversal.

//now attach the instance and accel to the geometry group
GeometryGroup GeoGroup = new GeometryGroup( Context );
GeoGroup.Acceleration = accel;
GeoGroup.AddChild( instance );

Create ray generation program

Now comes the creation of our main entry ray generation program and set it on the Context. This will be responsible for creating pinhole camera rays.

Program rayGen = new Program( Context, rayGenPath, "pinhole_camera" );
Context.SetRayGenerationProgram( 0, rayGen );

Create the output buffer and compile the Optix scene

Finally, we create our output buffer, making sure to define its format and type. The BufferType in Optix defines how the buffer will be used. The BufferTypes are: Input, Output, InputOutput, and Local. The first three are self explanatory. Local sets up the buffer to live entirely on the GPU, which is a huge performance win in multi-gpu setups as it doesn’t require us copying the buffer from GPU memory to main memory after every launch. Local buffers are typically used for intermediate results ( such as accumulation buffers for iterative GI ).

BufferDesc desc = new BufferDesc() { Width = (uint)Width, Height = (uint)Height, Format = Format.UByte4, Type = BufferType.Output };
OutputBuffer = new OptixDotNet.Buffer( Context, ref desc );

Now we setup shader variables to that will hold our top level GeometryGroup, and OutputBuffer. Then Compile Optix (this will validate our node layout and programs are correct) and build the acceleration tree, which only needs to be done on initialization or when geometry changes.

Context[ "top_object" ].Set( model.GeoGroup );
Context[ "output_buffer" ].Set( OutputBuffer );

Context.Compile();
Context.BuildAccelTree();

Ray-tracing and displaying results

To ray-trace the scene we call Launch and give the size of our 2D launch dimensions and the index of our main entry program (zero).

Context.Launch( 0, Width, Height );


And to display the results, we get a pointer to the output buffer, and we use OpenGl’s draw pixels:

BufferStream stream = OutputBuffer.Map();
Gl.glDrawPixels( Width, Height, Gl.GL_BGRA, Gl.GL_UNSIGNED_BYTE, stream.DataPointer );
OutputBuffer.Unmap();

Results:
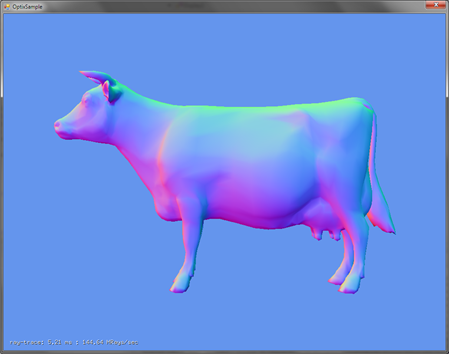
cow

And that’s pretty much it. A pretty simple program for doing GPU ray-tracing :-).

The current source, samples, and built executables are freely downloadable. Currently, I’ve got 5 samples that mimic the Optix SDK samples and will continue to add more to test functionality and eye candy.

You can download the current release and source here:
http://optixdotnet.codeplex.com/

Or get the source directly with Mercurial here:
https://hg01.codeplex.com/optixdotnet

Saturday, June 4, 2011

New Prey 2 E3 Trailer

Bethesda released a new trailer for Prey 2. I'm not gonna lie, it looks awesome.

Thursday, April 7, 2011

Monday, March 28, 2011

Instant Radiosity using Optix and Deferred Rendering

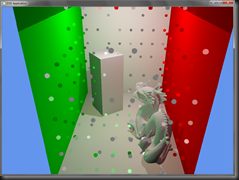
cornell_gi_0

This comes a little later than I wanted, I hadn’t factored in Crysis 2 taking up as much of my time as it did last week :-)

I’ve been using Nvidia’s Optix raytracing API for quite some time, and decided that a good introduction to Optix and what it can do for you would be using it in an Instant Radiosity demo. The demo is fairly large so I won’t cover all of it here, as that would be entirely too long of a post, but just the main parts.

Instant Radiosity

Instant Radiosity is a global illumination algorithm that approximates the diffuse radiance of a scene by placing many virtual point lights that act as indirect light. The algorithm is fairly simple: for each light in the scene you cast N photon rays into the scene. At each intersection the photon either bounces and another ray is cast or, through Russian Roulette, is killed of. At each of the intersections you create a Virtual Point Light (VPL) that has the same radiance value as the photon. Once you have these VPLs you render them as you would any other light source.

One optimization that the demo makes is to divide the scene into a regular grid. For each grid voxel, we find all the VPLs in the voxel and merge them together to form a new VPL that represents the merged VPLs. Any voxels that don’t contain any VPLs are skipped. This dramatically reduces the number of VPLs that we need to render, and trades off indirect accuracy for speed. The following couple of shots demonstrate this idea. The image on the left shows the VPLs as calculated from our Optix program. The image on the right shows the merged VPLs.

scattered_vpl grid_vpl

Optix

Optix is Nvidia’s ray tracing API that runs on Nvidia GPUs (on G80 and up). Giving an overview to optix could take many blog posts so I won’t go that in depth here. There are a couple of SIGGRAPH presentations that give a good overview:

http://nvidia.fullviewmedia.com/siggraph2010/04-dev-austin-robison.html
http://graphics.cs.williams.edu/papers/OptiXSIGGRAPH10/

To create an optix program you essentially need two things: a ray generation program and a material program ( essentially a shader ) that gets called when a ray intersects geometry. The ray generation program does exactly as it sounds, it generates rays. The program is called for each pixel of your program’s dimensions. Rays cast by your ray generation program will traverse the scene for intersections, once a ray intersects geometry it will call its material program. The material program is responsible for say shading in a classic ray tracer, or any other computation you want to perform. In our case we’ll use it to create our Virtual Point Lights. So lets get down to business.
Here we have the ray generation program that will cast rays from a light. In the case of our cornell box room, we have an area light at the ceiling and we need to cast photons from this light.

RT_PROGRAM void instant_radiosity()
{
     //get our random seed
     uint2 seed = seed_buffer[ launch_index ];

     //create a random photon direction
     float2 raySeed = make_float2( ( (float)launch_index.x + rnd( seed.x ) ) / (float)launch_dim.x,
                                   ( (float)launch_index.y + rnd( seed.y ) ) / (float)launch_dim.y );

     float3 origin = Light.position;
     float3 direction = generateHemisphereLightPhoton( raySeed, Light.direction );

     //create our ray
     optix::Ray ray(origin, direction, radiance_ray_type, scene_epsilon );

     //create our ray data packet and launch a ray
     PerRayData_radiance prd;
     prd.radiance = Light.color * Light.intensity * IndirectIntensity;
     prd.bounce = 0;
     prd.seed = seed;
     prd.index = ( launch_index.y * launch_dim.x + launch_index.x ) * MaxBounces;
     rtTrace( top_object, ray, prd );
}

So here we cast a randomly oriented ray from a hemisphere oriented about the direction of the light. Once we have our ray, we setup a ray data packet that will collect data as this ray traverses the scene. To cast the ray we make a call to rtTrace, providing the ray and its data packet.

Next we have our material program. This program is called when a ray hits the closest piece of geometry from the light. And it is responsible for updating the ray data packet, placing a VPL, and deciding to cast another ray recursively if we’re under the maximum number of bounces.

RT_PROGRAM void closest_hit_radiosity()
{
     //convert the geometry's normal to world space
     //RT_OBJECT_TO_WORLD is an Optix provided transformation
     float3 world_shading_normal   = normalize( rtTransformNormal( RT_OBJECT_TO_WORLD, shading_normal ) );
     float3 world_geometric_normal = normalize( rtTransformNormal( RT_OBJECT_TO_WORLD, geometric_normal ) );
     float3 ffnormal     = faceforward( world_shading_normal, -ray.direction, world_geometric_normal );

     //calculate the hitpoint of the ray
     float3 hit_point = ray.origin + t_hit * ray.direction;

     //sample the texture for the geometry
     float3 Kd = norm_rgb( tex2D( diffuseTex, texcoord.x, texcoord.y ) );
     Kd = pow3f( Kd, 2.2f ); //convert to linear space
     Kd *= make_float3( diffuseColor ); //multiply the diffuse material color
     prd_radiance.radiance = Kd * prd_radiance.radiance; //calculate the ray's new radiance value

     // We hit a diffuse surface; record hit if it has bounced at least once
     if( prd_radiance.bounce >= 0 ) {
          //offset the light a bit from the hit point
          float3 lightPos = ray.origin + ( t_hit - 0.1f ) * ray.direction;
          VirtualPointLight& vpl = output_vpls[ prd_radiance.index + prd_radiance.bounce ];
          vpl.position = lightPos;

          //the light's intensity is divided equally among the photons. Each photon starts out with an intensity
          //equal to the light. So here we must divide by the number of photons cast from the light.
          vpl.radiance = prd_radiance.radiance * 1.0f / ( launch_dim.x * launch_dim.y );
     }

     //if we're less than the max number of bounces shoot another ray
     //we could also implement Russion Roulette here so that we would have a less biased solution
     prd_radiance.bounce++;
     if ( prd_radiance.bounce >= MaxBounces )
          return;

     //here we "rotate" the seeds in order to have a little more variance
     prd_radiance.seed.x = prd_radiance.seed.x ^ prd_radiance.bounce;
     prd_radiance.seed.y = prd_radiance.seed.y ^ prd_radiance.bounce;
     float2 seed_direction = make_float2( ( (float)launch_index.x + rnd( prd_radiance.seed.x ) ) / (float)launch_dim.x,
                                          ( (float)launch_index.y + rnd( prd_radiance.seed.y ) ) / (float)launch_dim.y );

     //generate a new ray in the hemisphere oriented to the surface
     float3 new_ray_dir = generateHemisphereLightPhoton( seed_direction, ffnormal );

     //cast a new ray into the scene
     optix::Ray new_ray( hit_point, new_ray_dir, radiance_ray_type, scene_epsilon );
     rtTrace(top_object, new_ray, prd_radiance);
}

With both of these programs created we need to launch our optix program in order to generate the VPLs. When we’re done running the optix program, we gather all the VPLs into a grid, merging lights that are in the same voxel. Once the VPLs are merged, we add them to the deferred renderer.

//run our optix program
mContext->launch( 0, SqrtNumVPLs, SqrtNumVPLs );

//get a pointer to the GPU buffer of virtual point lights.
VirtualPointLight* lights = static_cast< VirtualPointLight* >( mContext["output_vpls"]->getBuffer()->map() );

//the following block merges the scattered vpls into a structured grid of vpls
//this helps dramatically reduce the number of vpls we need in the scene
if( mMergeVPLs )
{
     //Here we traverse over the VPLs and we merge all the lights that are in a cell
     for( int i = 0; i < TotalVPLs; ++i ) 
     {
          optix::Aabb node = mBoundingBox;

          //start with the root cell and recursively traverse the grid to find the cell this vpl belongs to
          int index = 0;
          if( FindCellIndex( mBoundingBox, -1, mVoxelExtent, lights[ i ].position, index ) )
          {
               //make sure we found a valid cell
               assert( index >= mFirstLeafIndex );

               //subtract the first leaf index to find the zero based index of the vpl
               index -= mFirstLeafIndex;
               float3& light = mVPLs[ index ];
               light += lights[ i ].radiance;
          }
     }

     //once the VPLs have been merged, add them to the renderer as indirect lights
     int numLights = 0;
     int lastIndex = -1;
     for( int i = 0; i < mVPLs.size(); ++i ) 
     {
          const float3& vpl = mVPLs[i];
          if( dot( vpl, vpl ) <= 0.0f )
               continue;

          numLights++;
          float3 radiance = vpl;
          D3DXVECTOR3 pos = *(D3DXVECTOR3*)&mVoxels[i].center();

          Light light =    {    LIGHT_POINT,                                                //type
                                GetColorValue(radiance.x, radiance.y, radiance.z, 1.0f),    //diffuse
                                pos,                                                        //pos
                                Vector3Zero,                                                //direction
                                1.0f                                                        //intensity
                           };

          renderer->AddIndirectLight( light );

          //also add as a light source so we can visualize the VPLs
          LightSource lightSource;
          lightSource.light = light;
          lightSource.Model = mLightModel;
          renderer->AddLightSource( lightSource );
     }
}

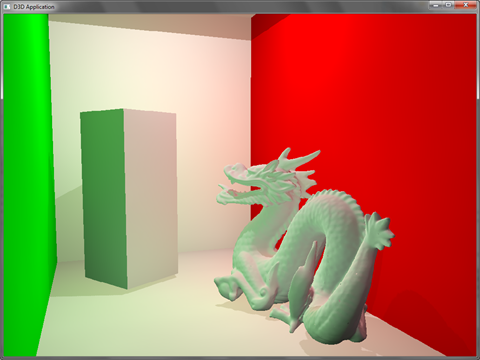
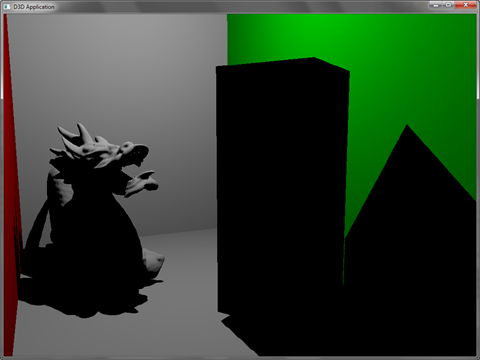
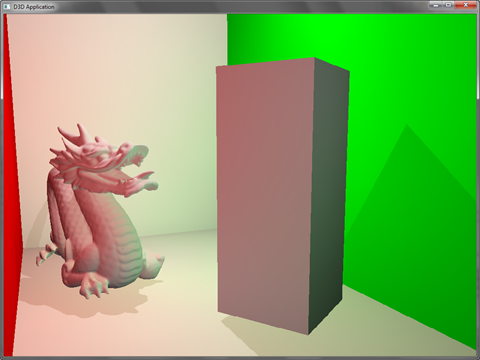
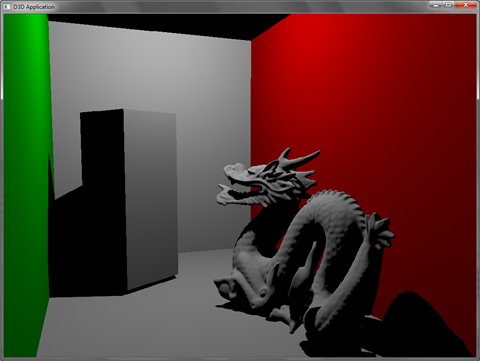
Now for some eye candy. The first set are your typical cornell box + dragon. In the Instant Radiosity shot you can see the light bleeding from the green and red walls onto the floor, the dragon and the box.

Direct lighting:
cornell_dl_0

Direct Lighting + Indirect VPLs:
cornell_gi_0

Direct Lighting:
cornell_dl_1

Direct Lighting + Indirect VPLs:
cornell_gi_1

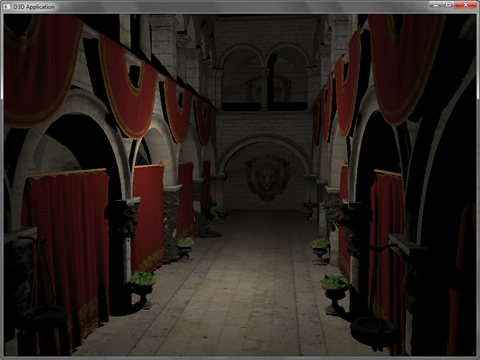
The next set is from the sponza scene. Here too you can notice the red bounced light from the draperies onto the floor and in the ambient lighting in the shadows.

Direct Lighting:
sponza_dl_0

Direct Lighting + Indirect VPLs:
sponza_gi_0

Direct Lighting:
sponza_nobounce

Direct Lighting + Indirect VPLs:
spona_bounce


Direct Lighting:
sponza_dl

Direct Lighting + Indirect VPLs:
spona_il


Notes

To Build the demo you’ll need boost 1.43 or later. To run the demo you’ll need at least an Nvidia 8800 series or later ( anything Computer 1.0 compliant ).

Files of interest are in the Demo project: OptixEntity.cpp and InstantRadiosity.cu.

Controls:
Show VPLs : L
Toggle GI : I
Toggle Merge VPLs : M


Download:

Sorry for requiring two download links but skydrive limits file sizes to 50MB
OptixInstantRadiosity Part 1 - Code
OptixInstantRadiosity Part 2 - Assets

Saturday, March 19, 2011

Instant Radiosity with Optix

I've been working on a new sample for the past few days, Instant Radiosity using Optix and DirectX. I should have a writeup and sample in the coming week.

Here’s a few shots with the obligatory cornell and sponza scenes.

Direct Lighting
cornell_dl_0

Direct + Indirect VPLs
cornell_gi_0

Direct Lighting
sponza_dl_0

Direct + Indirect VPLs
sponza_gi_0

Tuesday, March 15, 2011

Prey 2 Teaser Trailer

Human Head has been keeping me busy since I've been working there and I can finally say why: Prey 2. The game was announced on Monday :) Here's the Prey 2 teaser trailer:


http://www.g4tv.com/videos/51782/Prey-2-Debut-Trailer---Exclusive-Premiere/

Tuesday, August 3, 2010

Animating Water Using Flow Maps

flow

Last week I attended SIGGRAPH 2010, and among the many good presentations, Valve game a talk on the simple water shader they implemented for Left For Dead 2 and Portal 2. So on the plane ride back from LA, I whipped up this little sample from what I could remember of the talk. Edit: You can find the talk here: http://advances.realtimerendering.com/s2010/index.html

The standard technique for animated water is scrolling normal maps, as I’ve previously written about. The problem with this is that it looks unnatural as water does not uniformly move in one direction. So Valve came up with the idea of using flow maps ( based on a flow viz paper from the mid 90s ). The basic idea of flow maps is that you create a 2D texture that you will map to your water. And this map will contain the flow directions that you want the water to flow, with each pixel in the flow map representing a flow vector. This allows you to have varying velocity ( based on length of the flow vector ), and varying flow directions ( based on the color of the flow vector ). You then use this flow map to alter the texture coordinates of the normal maps instead of scrolling them. Lets get to work :)

The Flow Map

First we need to create a flow map. Here’s what I came up with in a couple of minutes in Photoshop. This flow map was designed around the column with dragon scene as with the previous scene. Note, this flow map is greatly exaggerated to demonstrate the effect.flowmap
Using The Flow Map

Now we need to use the flow map to alter the water normal maps. We do this by taking the texture coordinate of the current water pixel and offset it using the flow vector from the flow map based on a time offset. We then render the water as we did in the previous water sample. But there’s a problem with this, after awhile the texture coordinates will become so distorted that the normal maps will be stretched and will have nasty filtering artifacts. So to solve this we limit the amount of distortion of the texture coordinates by resetting the time offset. This solves the over-distortion, but now the water will reset every X seconds. So we introduce another layer, that is offset from the first by half a time cycle. This will ensure that while one layer is fading out and beginning to reset, the next layer is fading to where the last layer was. Here’s a diagram to visualize this phase-in phase-out of the 2 layers.

graph

The graph illustrates that during a cycle time from 0 to 1, we want the layer to be fully interpolated at the mid-point in the cycle, and fully un-interpolated at 0 and 1. Lets see the code:
//get and uncompress the flow vector for this pixel
float2 flowmap = tex2D( FlowMapS, tex0 ).rg * 2.0f - 1.0f;

float phase0 = FlowMapOffset0;
float phase1 = FlowMapOffset1;

// Sample normal map.
float3 normalT0 = tex2D(WaveMapS0, ( tex0 * TexScale ) + flowmap * phase0 );
float3 normalT1 = tex2D(WaveMapS1, ( tex0 * TexScale ) + flowmap * phase1 );

float flowLerp = ( abs( HalfCycle - FlowMapOffset0 ) / HalfCycle );
float3 offset = lerp( normalT0, normalT1, flowLerp );
In the code above, HalfCycle would be .5 if our cycle was from 0 to 1. We can see here that we unwrap the flow vector (as it is stored in [0,1] and we need it in [-1,1]), fetch the normals using the flow vector and then lerp between the two normals based on the cycle time. This however will lead to a subtle pulsing affect, which I couldn’t really notice when the water was rendered, but I included the fix for completeness. To fix this pulsing effect, we perturb the flow cycle at each pixel using a noise map.
//get and uncompress the flow vector for this pixel
float2 flowmap = tex2D( FlowMapS, tex0 ).rg * 2.0f - 1.0f;
float cycleOffset = tex2D( NoiseMapS, tex0 ).r;

float phase0 = cycleOffset * .5f + FlowMapOffset0;
float phase1 = cycleOffset * .5f + FlowMapOffset1;

// Sample normal map.
float3 normalT0 = tex2D(WaveMapS0, ( tex0 * TexScale ) + flowmap * phase0 );
float3 normalT1 = tex2D(WaveMapS1, ( tex0 * TexScale ) + flowmap * phase1 );

float flowLerp = ( abs( HalfCycle - FlowMapOffset0 ) / HalfCycle );
float3 offset = lerp( normalT0, normalT1, flowLerp );
And that’s pretty much it. I’ll update the post/source when the slides are posted from SIGGRAPH in case I left anything out. Video time!


Source/Demo: WaterFlow Demo

Thursday, May 6, 2010

Volume Rendering 202: Shadows and Translucency

Finally, here is the last sample on volume rendering. It’s only taking me a year to get around to finishing it. Is anyone even visiting this page anymore? I’d better post this for my sanity anyhow.
Last time I left you with some basic optimizations, one being a pseudo-empty space skipping. But as I noted, the volumes needed to be sorted in order for it to work completely. We sort the sub-volumes back to front with respect to distance to the camera. This insures that we have a smooth framerate no matter what angle the camera is at. A speedup we can do here is to only sort the volumes if the camera has moved 45 degrees since we last sorted.
So now our subvolumes are sorted w.r.t. the camera. But we have alpha blending artifacts because depending on the view, the pixels of the subvolumes are not drawn in the correct order. What we can do to fix this is to draw a depth only pass, and ensure that we only draw pixels that will contribute to the final image.

alpha_errors no_alpha_errors
Left: no depth prepass. Right: depth prepass

Translucency

The first sample includes an approximated translucency. It is far from realistic, but it gives fairly good results. The idea is very similar to depth mapping, compare the current pixels depth to that of the depth map, and either use this value to look up into a texture or perform an exponential falloff in the shader (the sample does the latter).

translucency

Shadows

There isn’t much to say here. The sample below uses variance shadow mapping.

shadow0 

shadow1


Well, there it is. Anticlimactic wasn't it?

Wednesday, May 5, 2010

Ground control to Major Tom

Wow, it’s been over a year since the last post on volume rendering! I must sound like a broken record. Anyhow, I’ve had time to fix a couple of bugs with the last installment in the past couple of weeks and it should be coming online pretty soon.

So why have I been absent lately? Last spring I was recruited to work on American Sign Language teaching software for Purdue University. The project ranged from database implementation, to layered skeletal animation with additive blending support and facial animation, to creating a language and compiler for ASL scripts (Antlr was amazing for this). Also, our paper was accepted at SIGGRAPH in the Education section.

On top of that I accepted a job at Human Head Interactive in January as a tech programmer ( these ramblings actually paid off :) ). I’m really excited to be working with some smart and talented people. We have some cool rendering tech – thanks to our lead graphics programmer – and pretty slick game play ideas.

Also, sorry to anyone who has commented on a post and it hasn't been posted, I've been spammed by bots for awhile now.

Saturday, April 10, 2010

Water for your monies?

I got an email a couple of weeks ago from someone ( Maximinus ) who actually put the water shader from the water game component to good use. Here's a description of the game on the xbox indie marketplace:

Missile Escape for Xbox Indies is simple : go flying, evade many
missiles and unlock new fighters along the way ! Warning : Fighter
pilot
spirit required.